Houts & Home Publications LLC
  • Welcome!
    • About Us >
      • Creating Houts & Home
      • H&H Partnerships
      • Press Kit
  • Books and Games
    • Horses Wear Shoes, Too
    • Country Colors, City Colors
    • Maye's March for Women's Votes
    • Hope Sees Her Condor
    • What Do Moms Do? >
      • Look inside What Do Moms Do?
    • Fun with Games!
    • Mealtime Magic >
      • About Mealtime Magic
      • Look Inside Mealtime Magic
  • View Recipes
    • Breads >
      • Quick Breads >
        • Blueberry Muffins
        • Boston Brown Bread
        • Buttermilk Biscuits
        • Basic Cornbread
        • Green Chili Cornbread
        • Hush Puppies
        • Irish Soda Bread
        • Italian Garlic Bread
      • Yeast Breads >
        • Dilly Bread
        • Favorite Dinner Rolls
        • Oatmeal Bread
        • Onion-Rye Bread
        • Pumpernickel Bread
    • Dips >
      • Chili Bean Dip
      • Crab Rangoon Dip
      • Creamy Ranch Dip
      • Guacamole Dip
      • Spicy Bean Dip
    • Fruit >
      • Apple Rings
      • Cinnamon Applesauce
      • Sliced Melon
    • Pasta and Rice >
      • Basic Brown or White Rice
      • Couscous
      • Spanish Rice
      • Wild Rice Pilaf
    • Salads >
      • Black Bean and Corn Salad
      • Broccoli Salad
      • Carrot-Raisin Salad
      • Citrus Salad
      • Cole Slaw
      • Cucumber Salad
      • Favorite Potato Salad
      • Fresh Fruit Salad
      • German Potato Salad
      • Mixed Green Salad
      • Orzo Salad
      • Pear and Walnut Salad
      • Tabouli Salad
      • Three-Bean Salad
      • Wilted Spinach Salad
    • Vegetables >
      • Roasted Asparagus >
        • Asparagus with Cheese Sauce
      • Boston Baked Beans >
        • Green Beans with Bacon
        • Green Beans with Almonds
        • Refried Beans
      • Broccoli with Cheese Sauce >
        • Steamed Broccoli
        • Stir-Fried Broccoli
      • Steamed Brussels Sprouts
      • Braised Cabbage >
        • Sweet and Sour Red Cabbage
      • Honeyed Carrots
      • Mashed Cauliflower >
        • Roasted Cauliflower
      • Corn on the Cob >
        • Grilled Corn on the Cob
        • Succotash
      • Crispy Breaded Eggplant
      • Fresh Veggies and Dip >
        • Grilled Vegetables
        • Roasted Vegetable Medley
      • Peas with Pearl Onions
      • Potatoes >
        • Au Gratin Potatoes
        • Baked Potatoes
        • Baked French Fries
        • Boiled New Potatoes
        • Garlic Mashed Potatoes
        • Hash Brown Potatoes
        • Mashed Potatoes
        • Potato Pancakes
        • Roasted Potatoes
        • Scalloped Potatoes
        • Twice-Baked Potatoes
        • Baked Sweet Potatoes
        • Baked Sweet Potato Fries
        • Candied Sweet Potatoes
      • Creamed Spinach >
        • Sautéed Spinach
      • Roasted Butternut Squash >
        • Stir-Fried Zucchini
  • Checkout
  • H&H Blog
    • Events
    • Links
  • Contact Us
    • Gift Shop Discounts
    • Submissions
    • Customer Care--Consumers
    • Customer Care--Retail
    • Shipping and Returns

Grilled Avocado Toast--Summer Cooking with Kids

5/15/2020

0 Comments

 
Picture
BIG THANKS to Traeger Grills for sharing their recipes!
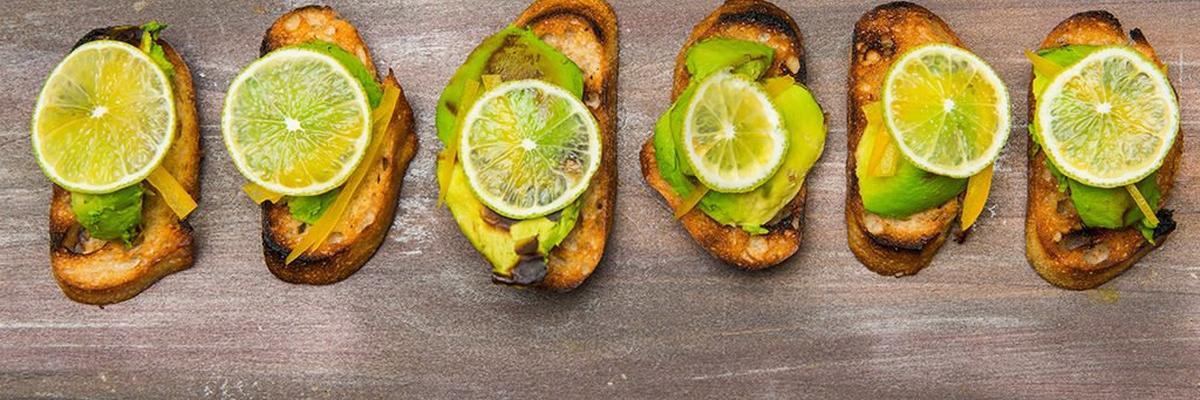
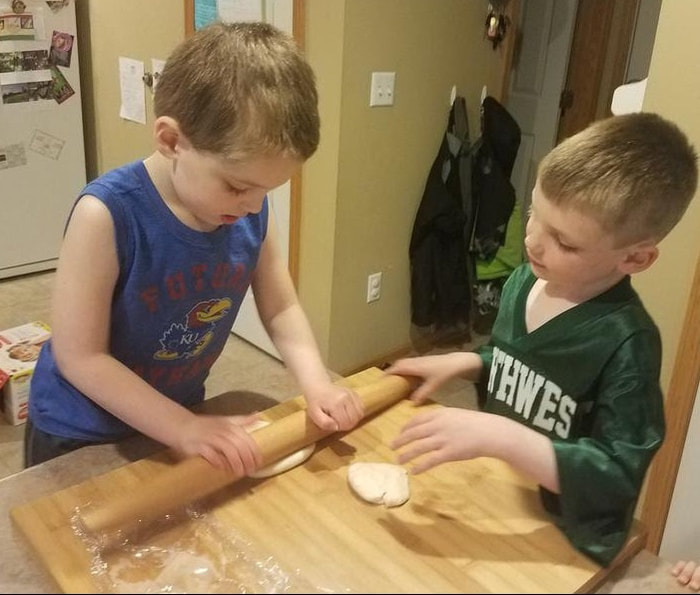
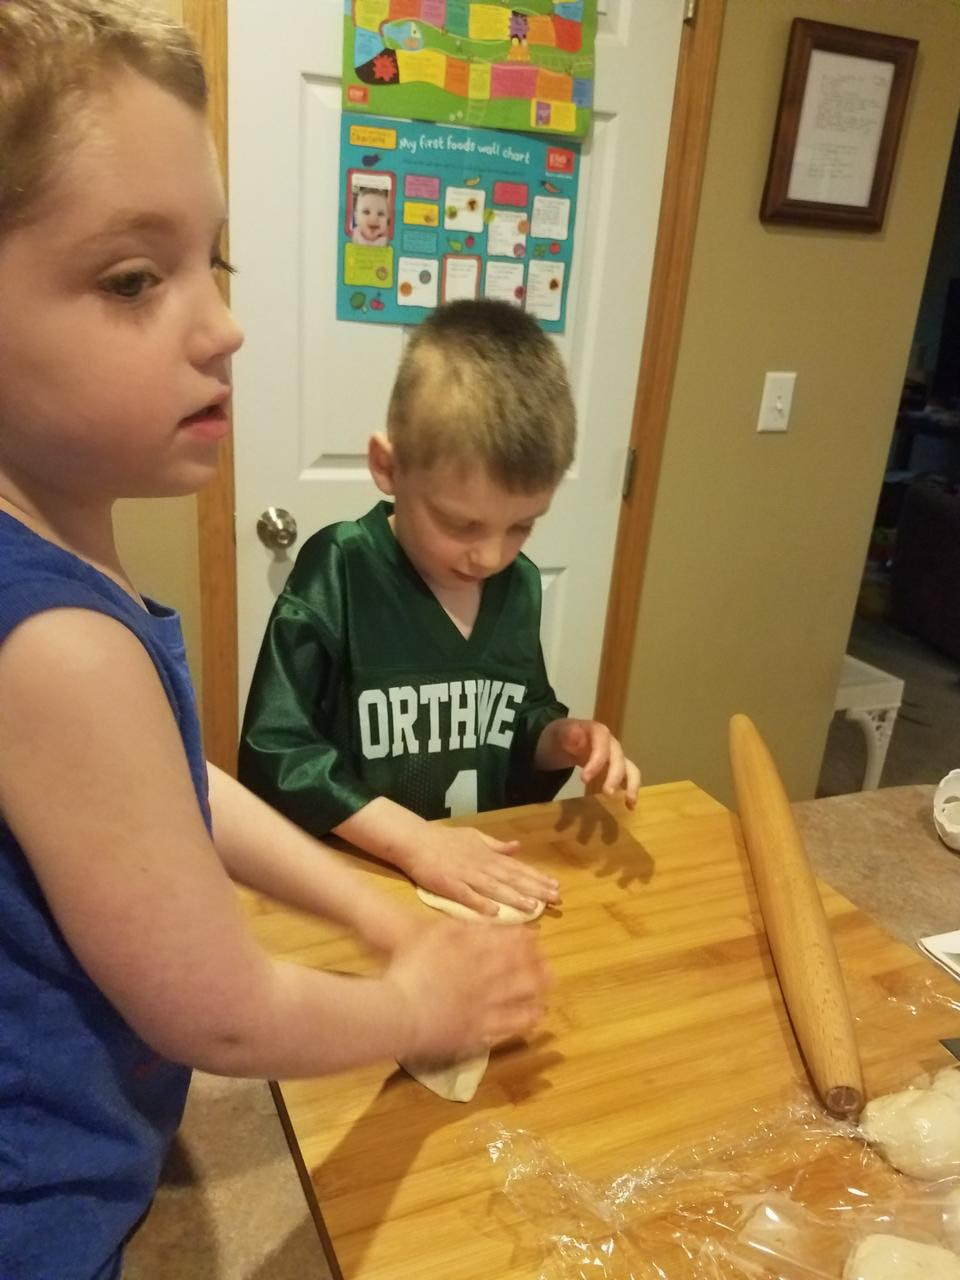
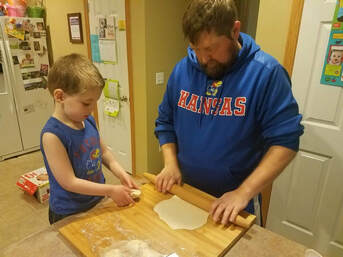
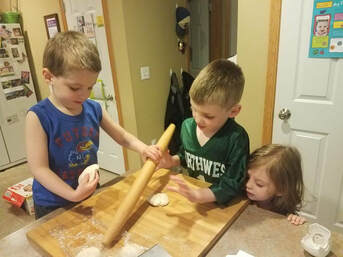
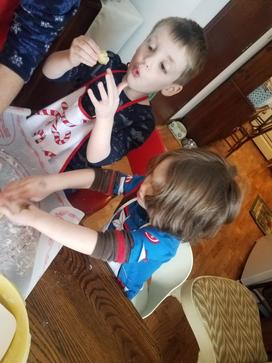
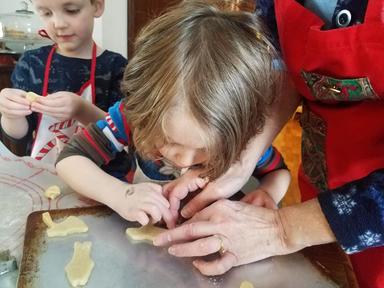
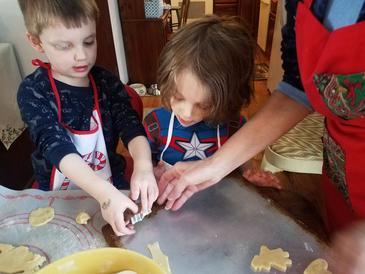
A tasty and healthy snack the whole family can enjoy making together. This simple appetizer is a good intro to grilling, because you don't have to worry about the potential contamination that comes with grilling meat. Future grillers can help season and measure while any child mature enough to attempt cooking (with supervision) has a very simple starter task. With only cut avocado and sliced bread to worry about, this recipe is close to foolproof.
INGREDIENTS
  • 1 loaf French bread, cut in 1 1/2-inch slices
  • 2 avocados, split in half, pit removed, skin on
  • 1 orange (zest and juice)
  • 1/4 cup olive oil
  • 2 tablespoons apple cider vinegar
  • 1 teaspoon honey
  • 1/2 shallot, diced
  • 1/2 Anaheim pepper, minced
  • 1 garlic clove, minced
  • smoked sea salt and pepper
DIRECTIONS
  1. Set your grill to medium heat (350°F).
  2. Lightly drizzle olive oil over bread slices. Lightly drizzle lime juice and olive oil over avocado halves.
  3. Place sliced bread and avocado halves on grate. Grill for approximately 5 to 10 minutes, or until the avocados have grill marks. Remove from grill.
  4. Make cross-hatching slices through grilled avocado halves; scoop out avocado flesh, cut flesh into thin slices.
  5. In a large bowl, zest orange and add juice from orange, olive oil, vinegar, and honey, whisk together. Add avocado pieces, Anaheim pepper, shallots, and garlic clove. Gently toss.
  6. Season to taste with sea salt and pepper. Top each slice of bread with a generous serving of avocado mixture. Enjoy!
TASKS FOR CHILDREN
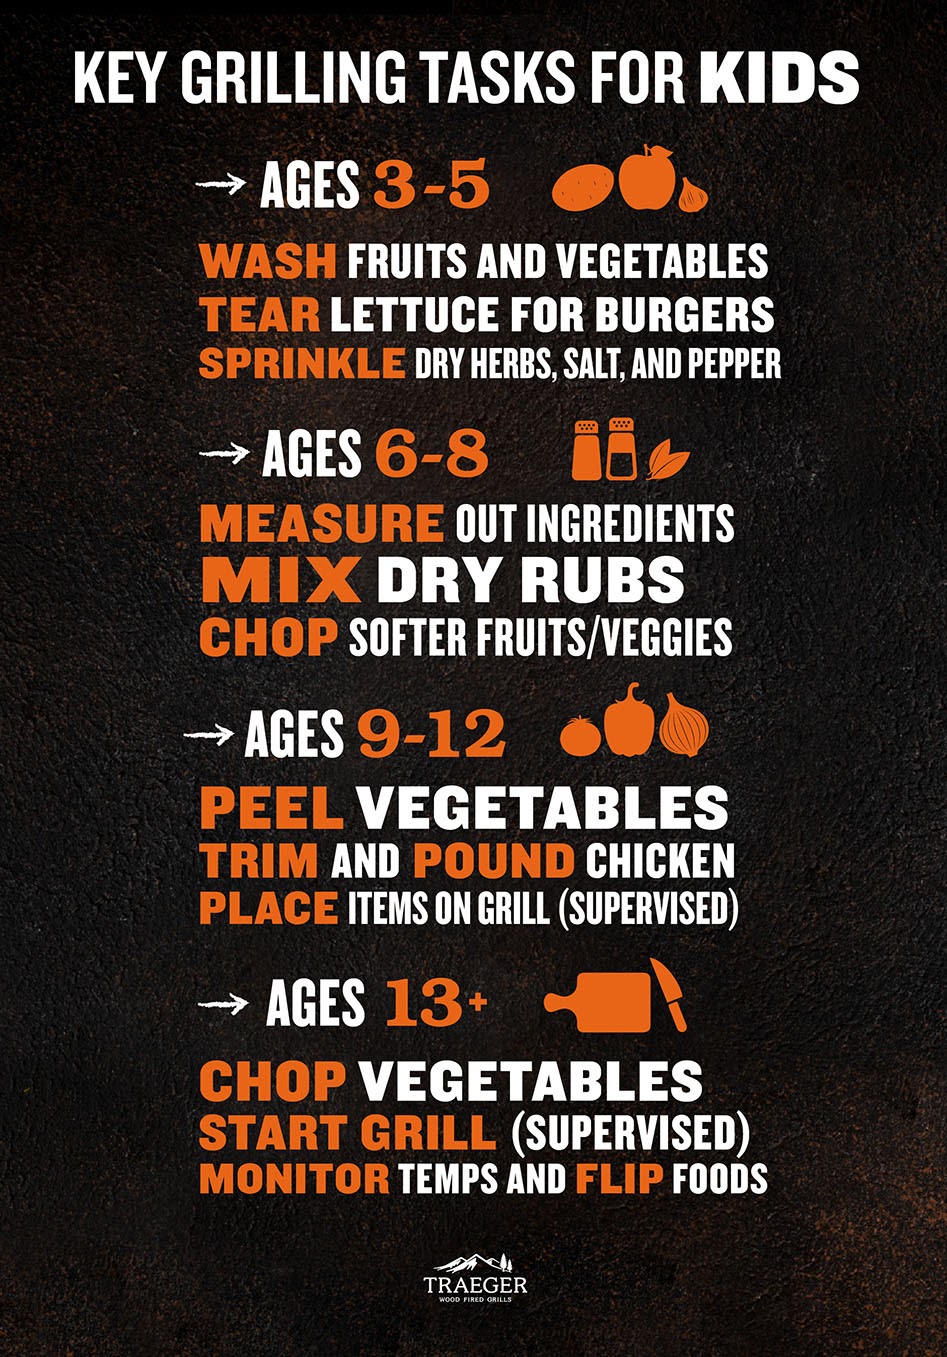
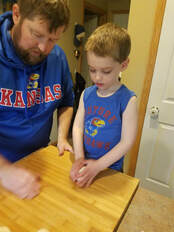
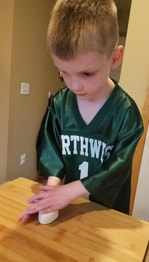
  • Ages 3 to 5 Sprinkle pre-measured amounts of salt and pepper on avocado mixture Spoon mixture onto toast
  • Ages 5 to 7 All tasks above Juice orange Measure olive oil, vinegar, honey Whisk wet ingredients
  • Ages 8 to 12 All tasks above Zest orange Slice bread Chop avocado, add pepper, shallots, and garlic, and toss mixture
  • Ages 13+ All tasks above Chop shallot, pepper, and garlic Turn on grill, set temp, monitor Place bread and avocado on grill, monitor, remove and peel/slice when cool.
See here for the overall Kids in the Kitchen cooking guide from Traeger Grills. 

Recipe adapted from our Avocado Toast recipe.
0 Comments

GRILLING WITH YOUR FAMILY: Get Kids Involved!

5/8/2020

0 Comments

 
Summertime is grilling time! Kids can help, but be safe! 
Big thanks to Traeger Grills for sharing this article and their recipes!
Here's a summary of what kids can do at each age group. 

AGES 3 TO 5 At this age, motor skills aren't fully developed and neither is attention span. Intricate tasks, tasks that require multiple steps, or tasks that require attention to detail aren't for this age group. Kids this age shouldn't be using implements either, even while supervised. But simple hands-only motions that don't require precision are perfect.
Appropriate tasks include washing fruits and vegetables, tearing lettuce into pieces for burgers or salads, or sprinkling pre-measured seasonings over dishes.
AGES 6 TO 8 This age group has begun to develop the motor skills and temperament to trust with child-safe implements. While you should still supervise, you can introduce kids to knife skills with nylon kid-safe knives. Depending on their maturity level, they may also be able to use graters and zesters. Kids at this age know and understand measurements so it will be good practice for their math skills to see if they can double or halve measurements of recipes.
Appropriate tasks include measuring ingredients, mixing dry rubs, and chopping soft fruits and vegetables such as bananas and zucchini.
AGES 9 TO 12 Most of the kids you'll see on MasterChef Junior fall into this age group, and as you see in the TV show, they can do a lot on their own. Different kids have different maturity levels, of course. If the child hasn't cooked before, start them with simple tasks. Then build up to more involved tasks where they are using appliances or working around heat or flame.
Appropriate tasks include peeling vegetables, pounding meat thin for the grill, and placing items on the grill (while closely supervised).
AGES 13+ Kids at this age should have the maturity level and motor skills to do just about any kitchen task the average adult can do. If they display these talents, you can have them help out with all phases of the grilling process from making their own dry rubs to prepping their own ingredients, and even taking their first steps as a grillmaster. This is also a safe age to begin allowing them to use sharp knives — after they complete a beginning knife skills course.
Appropriate tasks include chopping vegetables, starting the grill (closely supervised), and monitoring and flipping items as they cook.

See here for the overall Kids in the Kitchen cooking guide from Traeger Grills. 

Come back next week for a recipe for grilled Avocado Toast, Grilled Vegetables, and more! This is the first in a series on getting kids involved in summertime grilling! See you then! ~ Amy Houts
Picture
0 Comments

My Favorite Biscuit Recipe

3/21/2019

0 Comments

 
Picture
Place biscuits about 1-inch apart on cookie sheet.
Picture
Serve biscuits in a napkin lined basket, ready for butter and jam.

I've tried several recipes for biscuits. This one has the taste, texture I like best. The small amount of sugar doesn't make it taste sweet, but adds to the tenderness. Because I used almond milk, the biscuits didn't brown as much as they would with regular milk.

2 cups unbleached white flour
1 scant teaspoon salt
1 tablespoon baking powder
1 tablespoon sugar
1/2 cup shortening, butter, or margarine
2/3 to 3/4 cup milk or almond, soy, etc.

Preheat oven to 450 degrees F.

Stir together flour, salt, baking powder, and sugar in a medium bowl. Cut in shortening, butter, or margarine with a pastry blender or two knives until it looks like meal. Add milk and stir with a fork just until mixed.

Turn out onto a floured board or cloth. Knead about 10 times. Use a rolling pin to roll about 1/2-inch thick. Cut with a 2 1/2-inch biscuit cutter or use a drinking glass. Place on an ungreased cookie sheet about 1-inch apart. Bake for 10-12 minutes or until golden brown. Remove from cookie sheet to a napkin-lined basket. Best served warm with butter and jam.
Yield: 10-12 biscuits

0 Comments

Mix-in-the-Pan Applesauce Cake

3/4/2019

0 Comments

 
Picture
The cake pan is your mixing bowl.
Picture
Add the applesauce, water, oil, and vinegar.
Picture
Ready to bake.
Picture
I've cut the sugar by 1/4 in this yummy, easy-to-make cake, and it's still good! 

1 2/3 cups unbleached white flour
3/4 to 1 cup packed brown sugar
1 teaspoon baking soda
1 1/2 teaspoons allspice
1/2 teaspoon salt
1/2 cup unsweetened applesauce
1/2 cup water
1/3 cup oil
1 teaspoon cider vinegar
Powered sugar


Preheat oven to 350 degrees F. An 8x8-inch pan is your “mixing bowl.” Measure flour, brown sugar, baking soda, allspice, and salt into pan. Stir with a fork. Mash any lumps of brown sugar. Add applesauce, water, oil, and vinegar. Stir with a fork just until combined. Use a rubber spatula to get into the corners. 

Bake for 40 minutes, or until wooden tooth pick comes out clean. Let cool. Shake a strainer with a spoonful of powdered sugar over cake. No need to frost. Serves 9.
Picture
Sprinkle with powdered sugar before serving.
0 Comments

Involve Kids in Organizing Their Clothing

2/21/2019

2 Comments

 
Picture
Last weekend while visiting my daughter, Emily, she asked me to help her organize the boys’ clothes. Because of the size of the bedroom, the dresser for her five-year old twins sits in the walk-in closet. We made two piles:
  1. Hand-me-downs for their little sister were composed of a few special items like a Chicago Cubs shirt.
  2. Clothes to sell or giveaway were composed of items that were too small or ones they hadn’t worn because they didn’t like the style.  
The boys helped by sorting items and giving input. Emily asked pertinent questions:
  • “Do you wear this?"
  • "Do you like this?"
  • "Does this still fit you?”

And then she listened to what they had to say. Most of the time, these boys wear comfortable styles and activewear made from knit that pulls on rather than khakis, jeans, or button down shirts. But we kept a variety of styles for different occasions.

We hung up or folded the clothes to keep, making everything nice and neat. With two overflowing boxes of clothes to sell or give away, and a stack of shirts for little sister, we were feeling pretty good. And now there was room for clean laundry and new clothes for these growing boys. How do you keep your kids' clothing organized? 


2 Comments

Cookbook Shelf

1/17/2019

0 Comments

 
Picture
My daughter, Emily, keeps her cookbooks in a cabinet above the stove. When I visited last week, she mentioned that I might help her organize it, so when her two-year old was sleeping and the twins were still at school, we got started. Here's what we did. 
  • First, we took everything down, all the books, magazines, loose recipes, appliance info, coupons, and menus.
  • Then we reshelved the cookbooks by grouping them in these categories from left to right: baking, cooking with kids, quick and easy meals, booklets, miscellaneous, and basic cookbooks. 
  • We looked through the loose recipes, deciding what to keep. We placed them in plastic sleeves in a three-ring binder. (See "Recipe Keeper" above.)
  • We gathered all the coupons in a  plastic organizer and stacked the menus in a similar plastic envelope. 
  • We began looking through the cooking magazines and clipping only those recipes that Emily was sure she wanted to make. (I stored the rest of the magazines on a low bookshelf for Emily to review as time allowed.)
  • Finally, I took the appliance info to the basement. 
Now Emily and her husband have a neat, organized cookbook shelf that they can easily use. What are the steps you've taken to organize an area of your home? 

0 Comments

Twins Makes Tortillas, Step-by-Step

1/14/2019

0 Comments

 
My twin grandsons had such fun learning how to make flour tortillas. Their father taught them how to work and roll the dough. Dr. Mary L. Gavin writes about a few of the benefits of cooking with children, such as building basic skills, boosting confidence, and exploring with the senses in her article here titled "Cooking with Preschoolers." My cookbook, Cooking Around the Calendar with Kids here, includes over a hundred pages of recipes to help children experience each season of the year.

Picture
Picture
Picture
Picture
Picture
Picture
Picture
Picture
Picture
Picture
Tortillas are stuffed with chicken, peppers, onions, and cheese.
Picture
Picture
Their younger sister, Charlotte, looks on.
Picture
Picture
Picture
0 Comments

Birthday Cake Baking with Kids

1/14/2019

1 Comment

 
Picture
Preparing the cake pans. My first mistake.
While visiting my grandchildren, Toby and Charlotte wanted to help bake a birthday cake. Both their mom and grandpa's birthdays were in January and we were going to celebrate! First, I showed them how to grease and flour the pans. But I should have cut and placed a circle of waxed paper or parchment paper in the bottom. That would have helped the cakes to stay in one piece when removing them from the pans, but I forgot. 
Picture
My second mistake was preheating the oven to 350 degrees F. I knew that the temperature for dark cake pans needed to be 25 degrees lower, but I forgot. So the cake was dry.

My third mistake was waiting too long before turning the cakes out of the pan. At home, I usually put the timer on for 10 minutes. I got distracted playing with the kids and lost track of time. It was probably an hour. And yes, they fell apart. 

​My fourth mistake was making frosting that was too thick. Trying to spread the frosting to "glue" the cake together was not working very well. A thinner frosting would have been easier to spread. 

I was too embarrassed to share the end results until my daughter encouraged me. Even cookbook authors like me have failures! It makes me appreciate the successes so much more. At least one way this experience was a great success was spending time with grandchildren baking. And the frosted cake tasted great! What mistakes have you made? And your great success?
Picture
The really bad side.
Picture
The better side.
1 Comment

Reversible Christmas Magazine Rack

1/14/2019

0 Comments

 
Picture
Picture
​I bought this galvanized steel tub--the perfect size for a magazine rack--for our newly remodeled bathroom. I loved the Christmas pickup-truck, and discovered that I could turn the picture toward the wall to use the tub all year 'round. Plus, 35% off for an after-Christmas discount helped make it affordable. I bought the copper-handled trash can at another store. Are galvanized steel accessories new this year, or am I just noticing them? I like the farmhouse look, especially for our outdoor theme. The painstaking removal of the 1990s pink-flowered wallpaper border, which we had added when our daughters were young, was well worth it. And because of using the wrong kind of cleaner that etched our porcelain tub (yes, I did that!) we had the tub reglazed. That's what started this transformation. One thing led to another, but now it's done and we can relax and enjoy it! What are you working on, big or small, in your home?
Picture
0 Comments

Baking Painted Sugar Cookies

12/28/2017

4 Comments

 
Picture
Play with a lump of dough.
Picture
Carefully place shape on cookie sheet.
Picture
Picture
Picture
Beat egg yolk with 1/4 teaspoon of water and a few drops of food coloring.
Picture
Use clean paint brushes. Paint before baking.
Picture
Grandpa helps, too.
Picture
Best fresh out of the oven.
4 Comments
<<Previous
Forward>>

    Archives

    February 2022
    September 2021
    April 2021
    February 2021
    December 2020
    June 2020
    May 2020
    March 2019
    February 2019
    January 2019
    December 2017
    November 2017
    September 2017
    July 2017
    February 2017
    January 2017
    September 2016
    August 2016
    July 2016
    June 2016
    May 2016
    April 2016
    March 2016
    January 2016
    December 2015
    November 2015
    October 2015
    September 2015
    August 2015
    July 2015
    June 2015
    May 2015
    April 2015
    November 2014
    October 2014
    September 2014
    August 2014
    July 2014
    June 2014
    March 2014
    January 2014
    December 2013
    November 2013
    October 2013
    September 2013
    August 2013
    July 2013
    June 2013
    May 2013
    April 2013
    March 2013

    RSS Feed

    Picture

    Categories

    All
    Activity
    Apple Crisp
    Aprons
    Babies
    Baking Bread
    Birthday
    Bookcase
    Books
    Bread Machine
    Bread Recipe
    Bread Without A Bread Machine
    Breakfast
    Butternut Squash
    Cake
    Cherry-peach Pie
    Cleaning
    Clothing
    Clutter
    Cozy Kitchen
    De Clutter
    De-clutter
    Dirt Cups
    Freezing
    Freezing Apples
    Freezing Green Beans
    Friends
    Give Away
    Gluten-free
    Granola
    Guests
    Halloween
    Hero Sandwiches
    Home Cooked
    Home-cooked
    Homemade Bread
    Hot Dogs
    Internet
    Jacket
    Kitchen
    Lasagna
    Lists
    Manners
    Mealtime Magic
    Meatballs
    Memory
    Menu Planning
    Muffins
    Nancy Browning
    No Preservatives
    Oatmeal
    Oatmeal Bread
    Parenting
    Photos
    Pie
    Pie Crust
    Pudding
    Pumpkin
    Pumpkin Seeds
    Quick Breads
    Salsa
    Save Money
    Save Time
    Shared Cleaning
    Sponges
    Spring Cleaning
    Steel Cut Oats
    Stew
    Sunflowers
    Thank You Cards
    Three-Day Plans
    Throw Away
    Tickler Cards
    Tomatoes
    Twins

Customer Care                                                                                                                       Policies
Consumers
Retailers
Contact Us

Copyright 2011 Houts & Home Publications LLC
Privacy
Terms of Use 
Shipping and Returns